

Christmas Decorating With Fake Tree Outside
Learn how to make Christmas decorations from an old fake Christmas tree. Outdoor Christmas garland, swag and an alpine tree – DIY Christmas decor at its finest!

On a recent trip to the dump, I found a boxed fake Christmas tree at Put & Take. Greg didn't want to take it, as there was a note on the box telling that it had some missing parts.
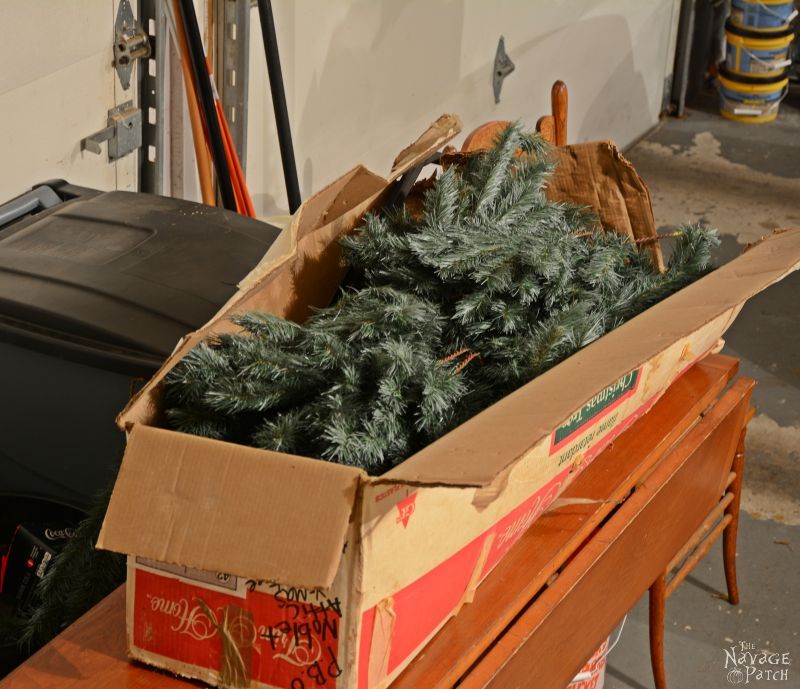
Thinking that a branch or two might be missing, we took it home. Then came the slow realization, LOL!
H: You see! I was right! It's only missing some branches. No big deal! 🙂
G: Awesome, my Babes!
H: (shortly after) Oh golly!
G: What's wrong?
H: Yeah, I think it's also missing the trunk. Oh well, I guess I can work with that. 😕
G: It's okay, my Babes. [whispers] I told you so…
H: What the heck?? The branches are from two different types of tree!
G: [whispers louder] I told you so! [yelling upstairs to our son] Hey boy! Come down and look at your mother's new Christmas branch! Bwahahahahah!
While Greg and Barish were having a great laugh and yammering on about Charlie Brown's scrawny tree, I was waiting for a light bulb to switch on over my head. And oh boy! Did it light ever so bright!
Before we go any further, be sure to follow us on Pinterest, YouTube, Facebook and Instagram, and click the subscribe button at the top of this page to sign up for our email list so you'll never miss a post!
DIY Christmas Decor: How to Make Christmas Decorations from an old faux Christmas tree
DIY Christmas decor is what we're all about here at The Navage Patch, and one of the first things I did when we moved to The States was teach myself how to make Christmas decorations from whatever we had lying around or whatever we could find at the dump. Money was tight, so buying them was not an option! In later years, we found that making our own decorations gave us much more joy than buying them, and this little tree was going to give us three awesome decorations!
I planned to repurpose the faux Christmas tree to an outdoor Christmas garland. With that idea in mind, I set to work, and not only did I make a lovely outdoor Christmas garland from it, but also two clip-on Christmas swags for our garage (click on page 2 to see the Christmas swags tutorial) , and a faux 8-foot-tall Alpine Christmas tree for our living room (click on page 3 to see the alpine tree tutorial.)
After making all that, I still have more than enough branches to make some small pathway trees, two big kissing balls and a couple more swags. I guess when I finish the rest, I'll help Greg and Barish picking their jaws up from the floor. LOL. 😆
Outdoor Christmas Garland
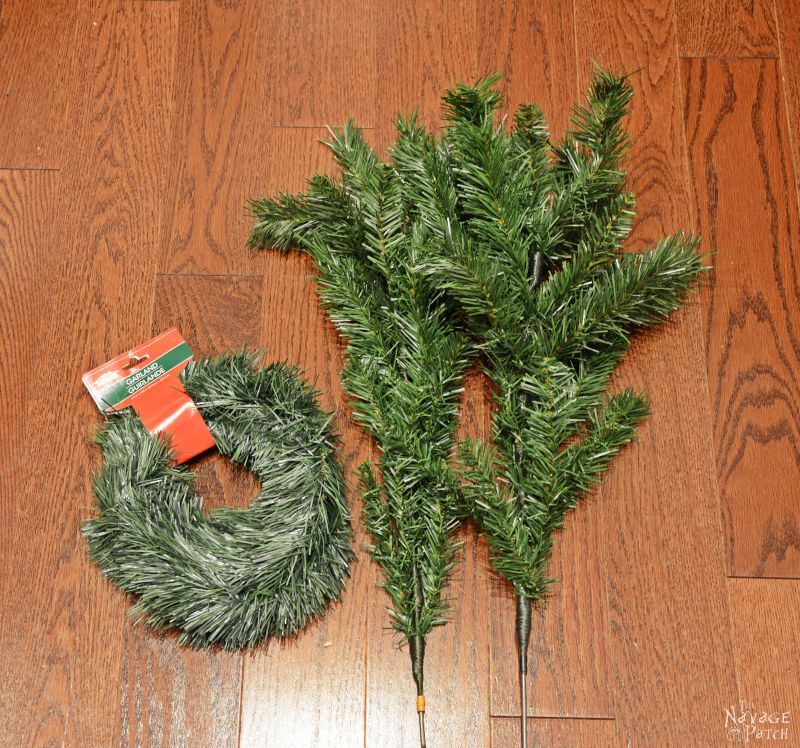
Luckily, one group of branches was color-coded for length and branch size, so before doing anything, I grouped them according to their codes. Then I picked the group that had the most branches. I also grabbed 3 packs of Dollar Store garland (cheap single-line pine garland – 1$ each) and all the old Christmas lights Mom and Dad had given us.
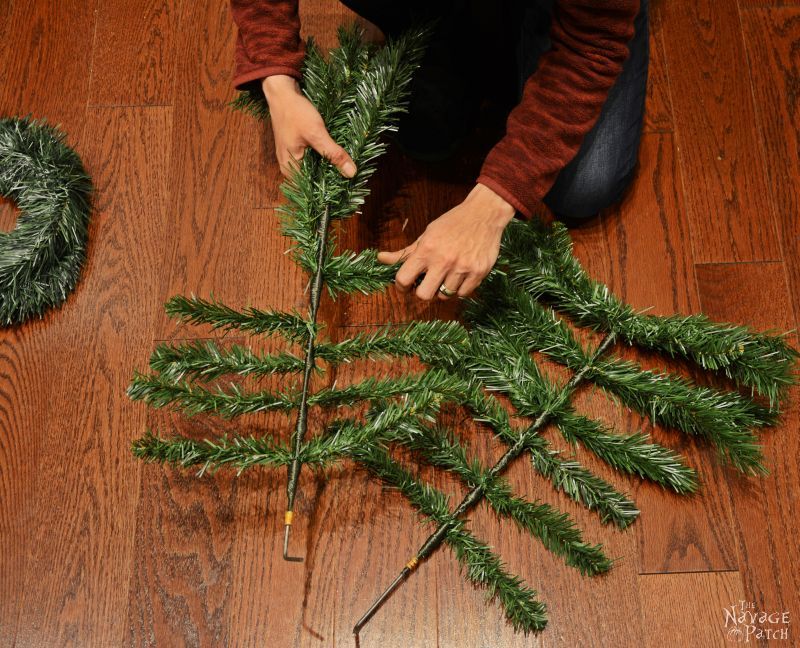
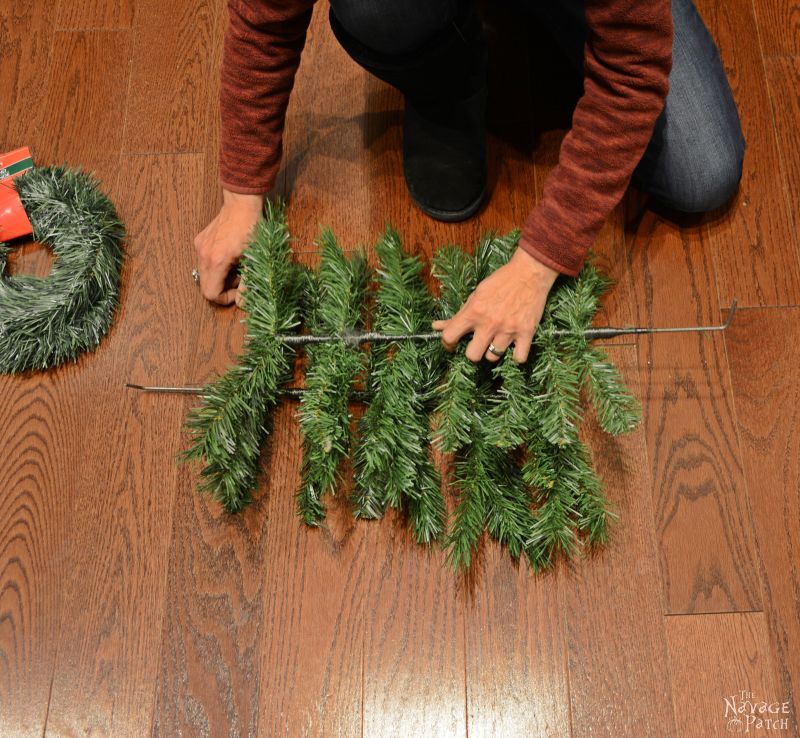
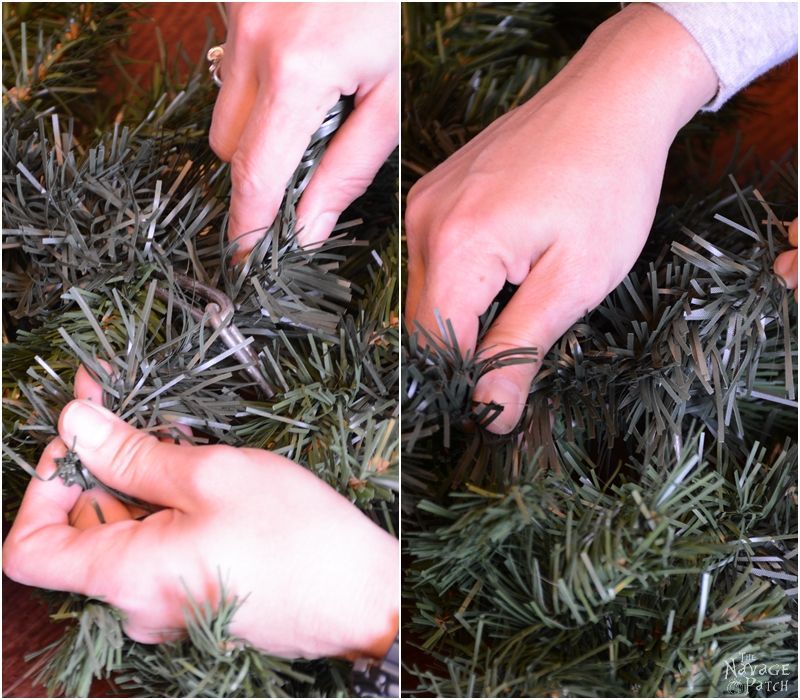
First, I opened and flattened the branches, as shown in the picture below.
Then, I bent the end of the steel stems with a black steel pipe to give them a hook shape.
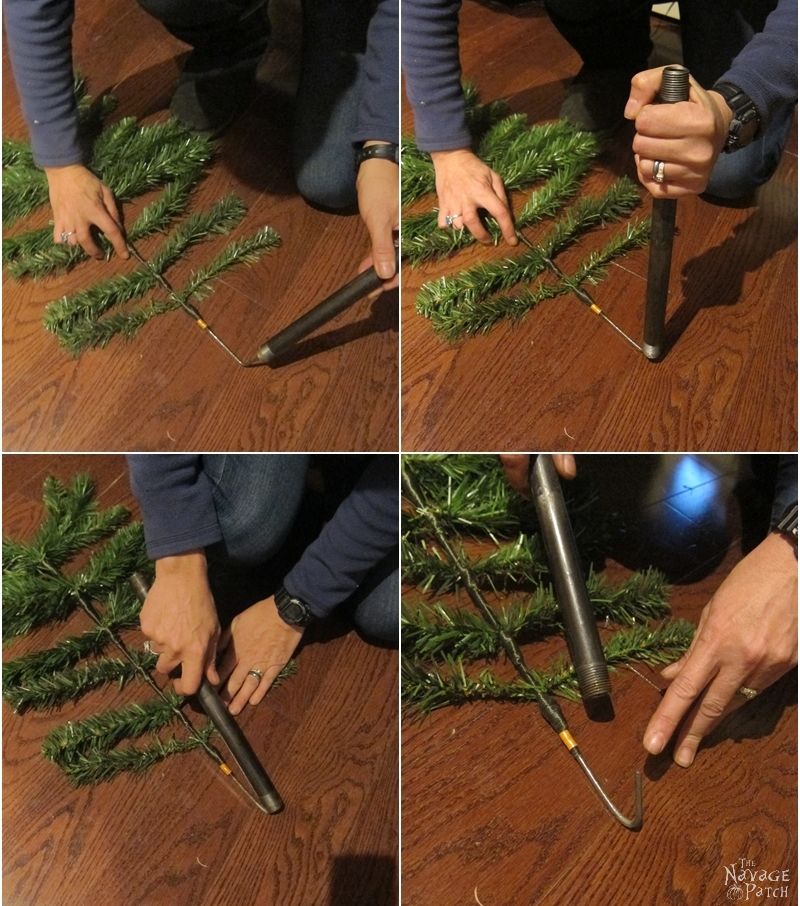
Next, I placed them on top of each other in a way to have each branch pointing the opposite way – do you see picture below? The reason for each branches pointing opposite ways was so I could have a connection point to link every piece to each other.
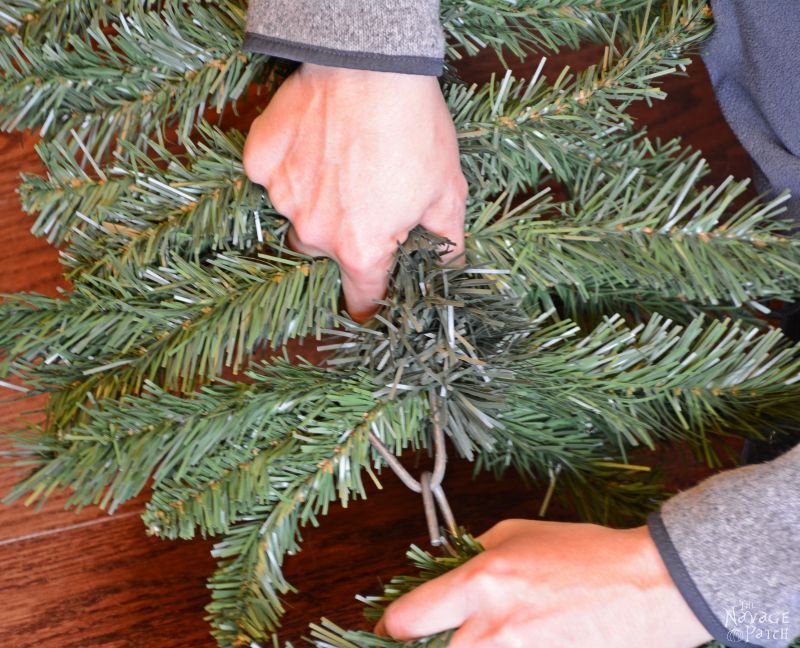
After positioning them correctly, I wrapped the Dollar Store pine garland to tie the two branches together. While I was at it, I also wrapped the garland to the areas where the steel stem was showing.

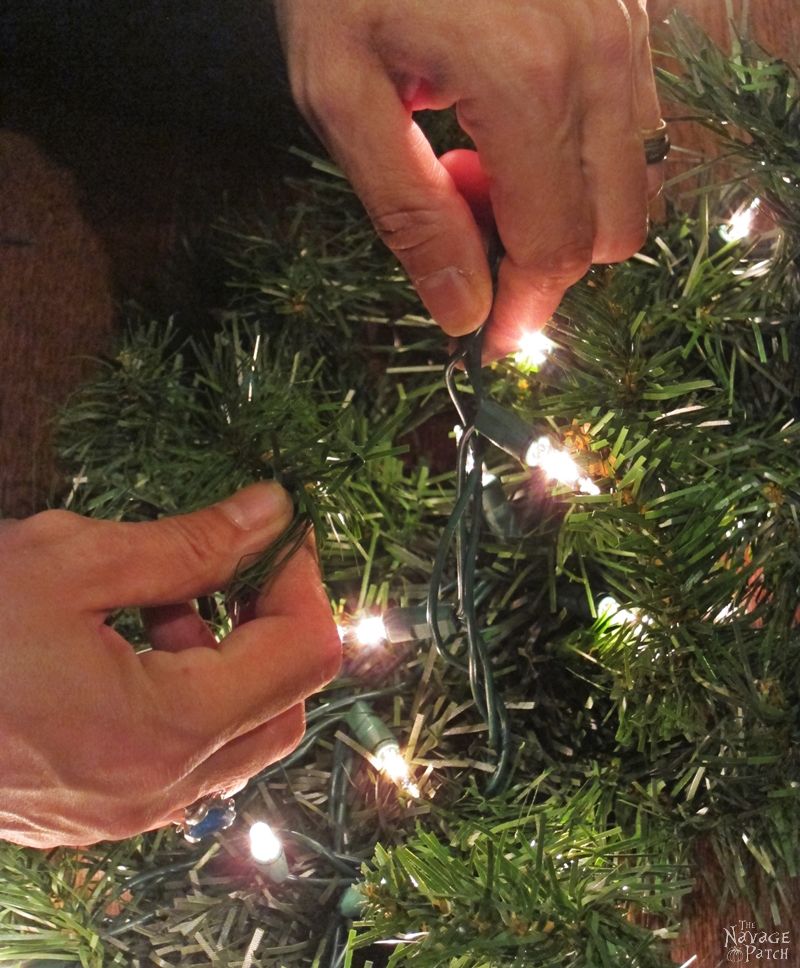
Once I prepared a good number of these pieces, I connected the pieces by hooking them to each other.
To secure the connection points, Greg bent those hooks even more.
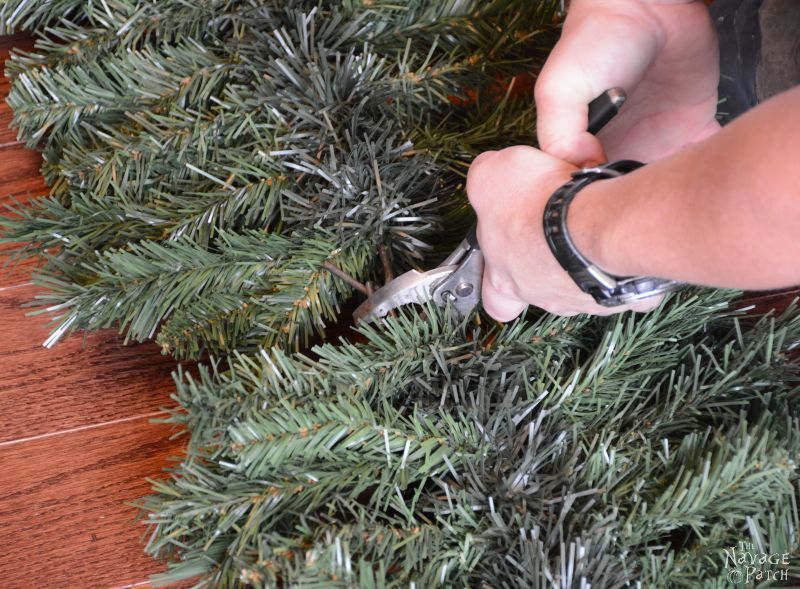
You can see from the picture below how the connection points were after Greg secured them. I have to say, he did a great job with that, so he earned some extra 'Good hubby' points. Hehehehe 😉
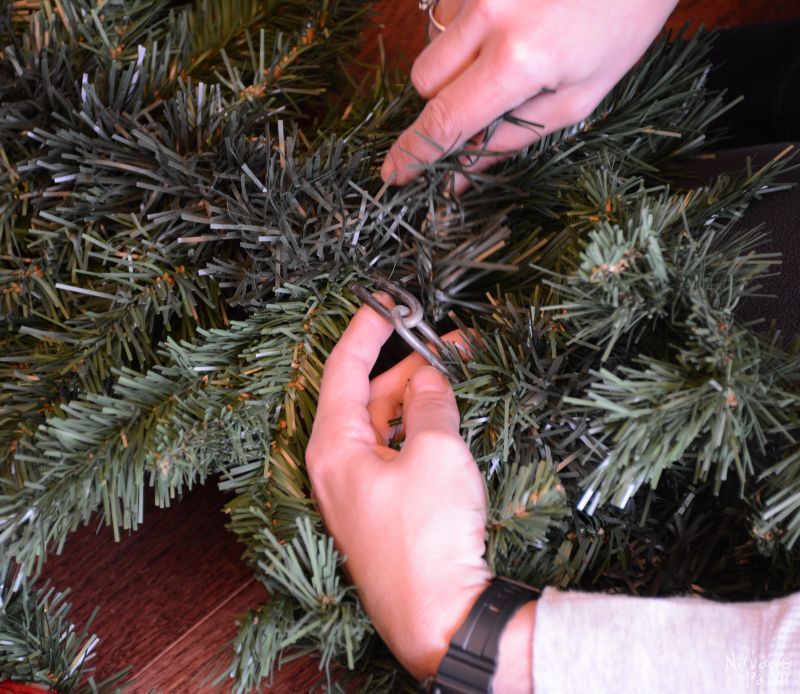
When all the connection points were secured, I again wrapped them with a single line of cheap garland just to hide the steel hooks, and with that the main structure of the garland was basically finished.
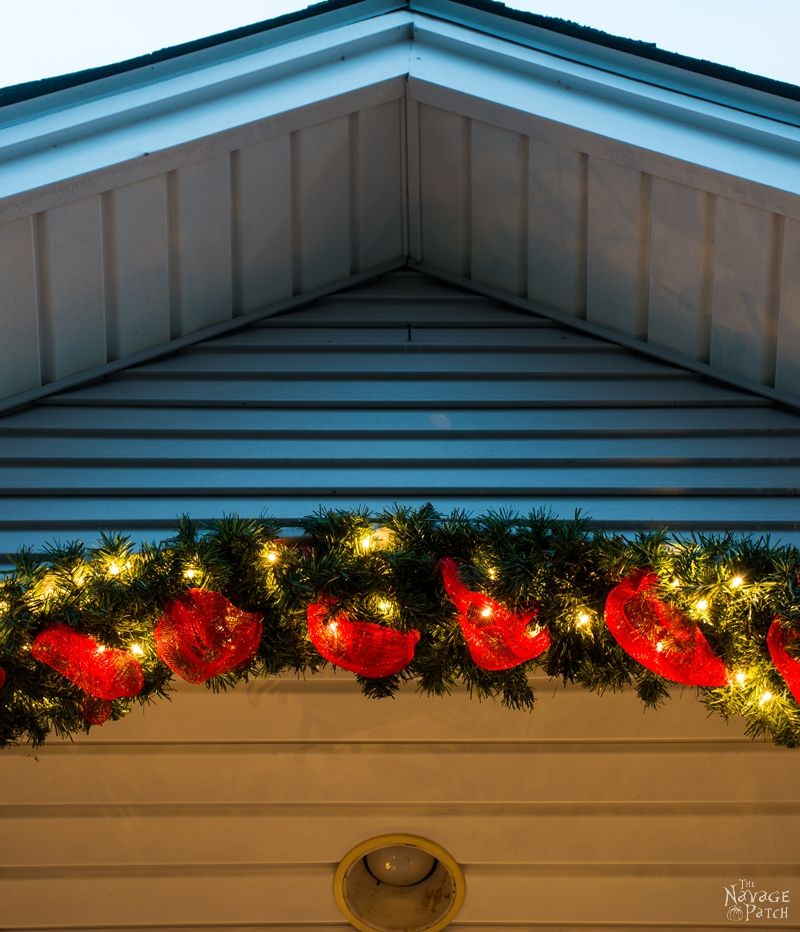
To make them look better, I wrapped the Christmas lights onto the branches.
Once I finished adding lights, I embellished the garlands with a red deco poly mesh ribbon I bought from Walmart.
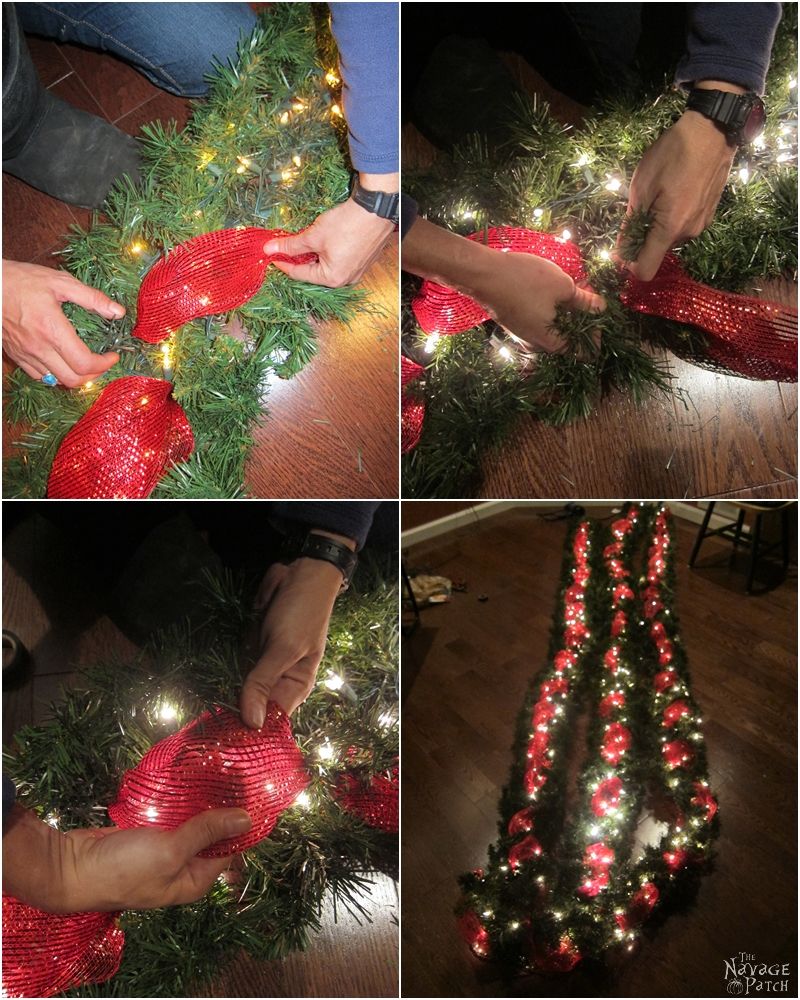
In case you are wondering, I only made two big pieces of garlands with the Put & Take tree branches. The third garland you see in the above picture is made from plain pre-lit garlands (the four I already had in storage), because I needed something light to put on the overhead arch of the portico.
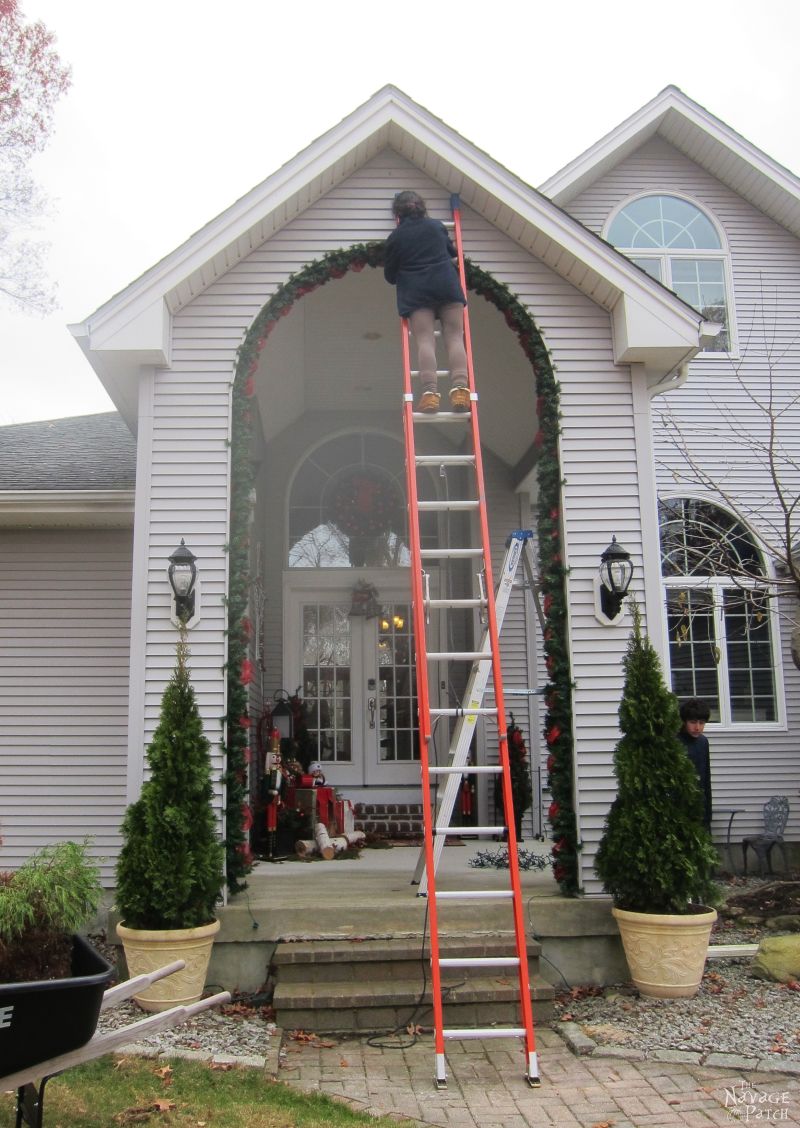
Before I forget, do you know how easy it was to hang my DIY garlands? Well, you know the ones I made had hook-shaped ends (remember the picture above?), so Greg just put one screw on each of the vertical faces and hooked the garlands on those screws. That's how easy it was! I didn't even have to move a muscle 😉
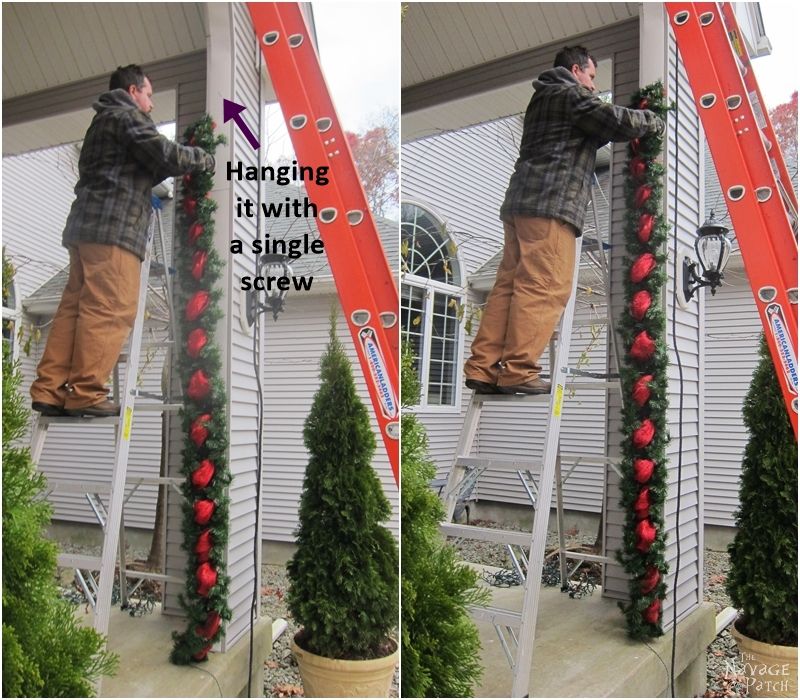
Then I went up and put the curved section's garland in place.
Here are the beauty shots of our DIY outdoor Christmas garland.
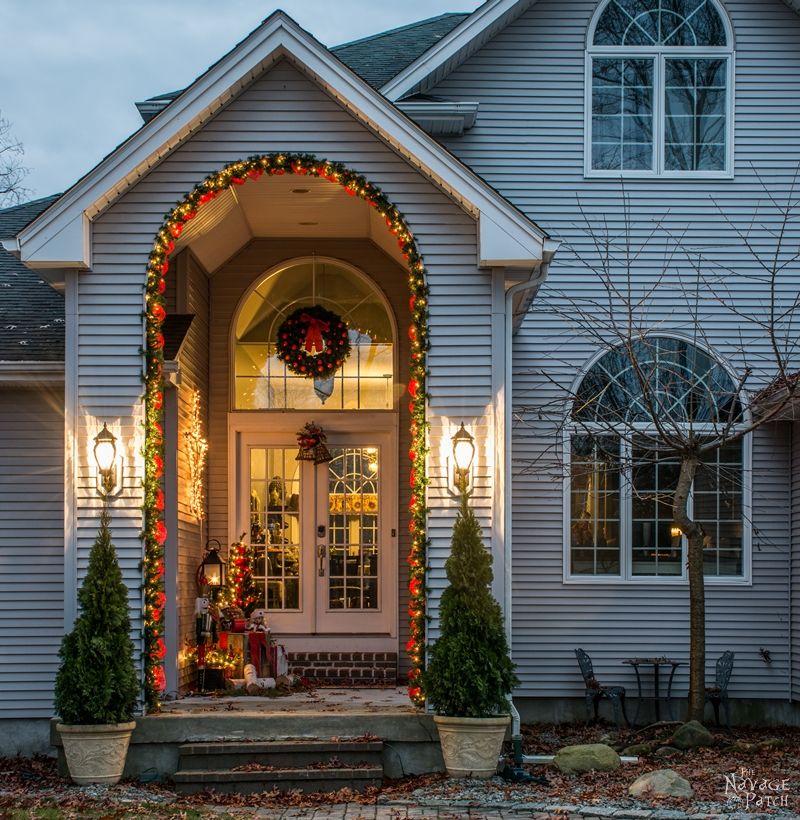

Can you believe that this was a faux Christmas tree at one point? Pretty amazing how everything can get repurposed if we are willing to give some time and love to it!

Now let's make some easy-peasy clip-on swags with some branches of our faux Christmas tree, shall we?
Click on 'Next' below to continue with the clip-on swags tutorial.
Christmas Decorating With Fake Tree Outside
Source: https://www.thenavagepatch.com/faux-christmas-tree-repurposed-three-ways/
Posted by: bridgesshen1994.blogspot.com
0 Response to "Christmas Decorating With Fake Tree Outside"
Post a Comment